So as I am cleaning out my sewing room, I came across my stash of wool. I feel like my wool days are over and added it to the pile of things to give to my guild.
This piece of ticking was stuck in with my wool. Then I remembered why I put it there......
I heard of people making rugs using their wool scraps that they sewed on to a piece of ticking, using the lines as a guide. So I cut up some wool approximately 1" x 3". I did not measure just eyeballed it. Threw them in this bin and mixed them up. Next, sew some wool strips all along the outside edge of your rug, the same way you would do a border on a quilt. {no picture}. I used 4" strips. You will use this as a facing to finish the edge and sew it to the back after you make your rug.
To start, working from the top down, take a strip starting in the middle of your rug and work to the right if you are right handed.
Fold the strip in half to find the middle and place it on a ticking stripe {see above}. This sounds way more confusing than it is.
Sew all the way down one ticking stripe and then.........
fold your first row over and about 1/4" away start your next row. You can use the red or the white stripes it doesn't matter. Not all of mine are exactly 1/4" but you don't want too much space or the ticking will show.
Finish the one side, turn your rug and finish the other side.
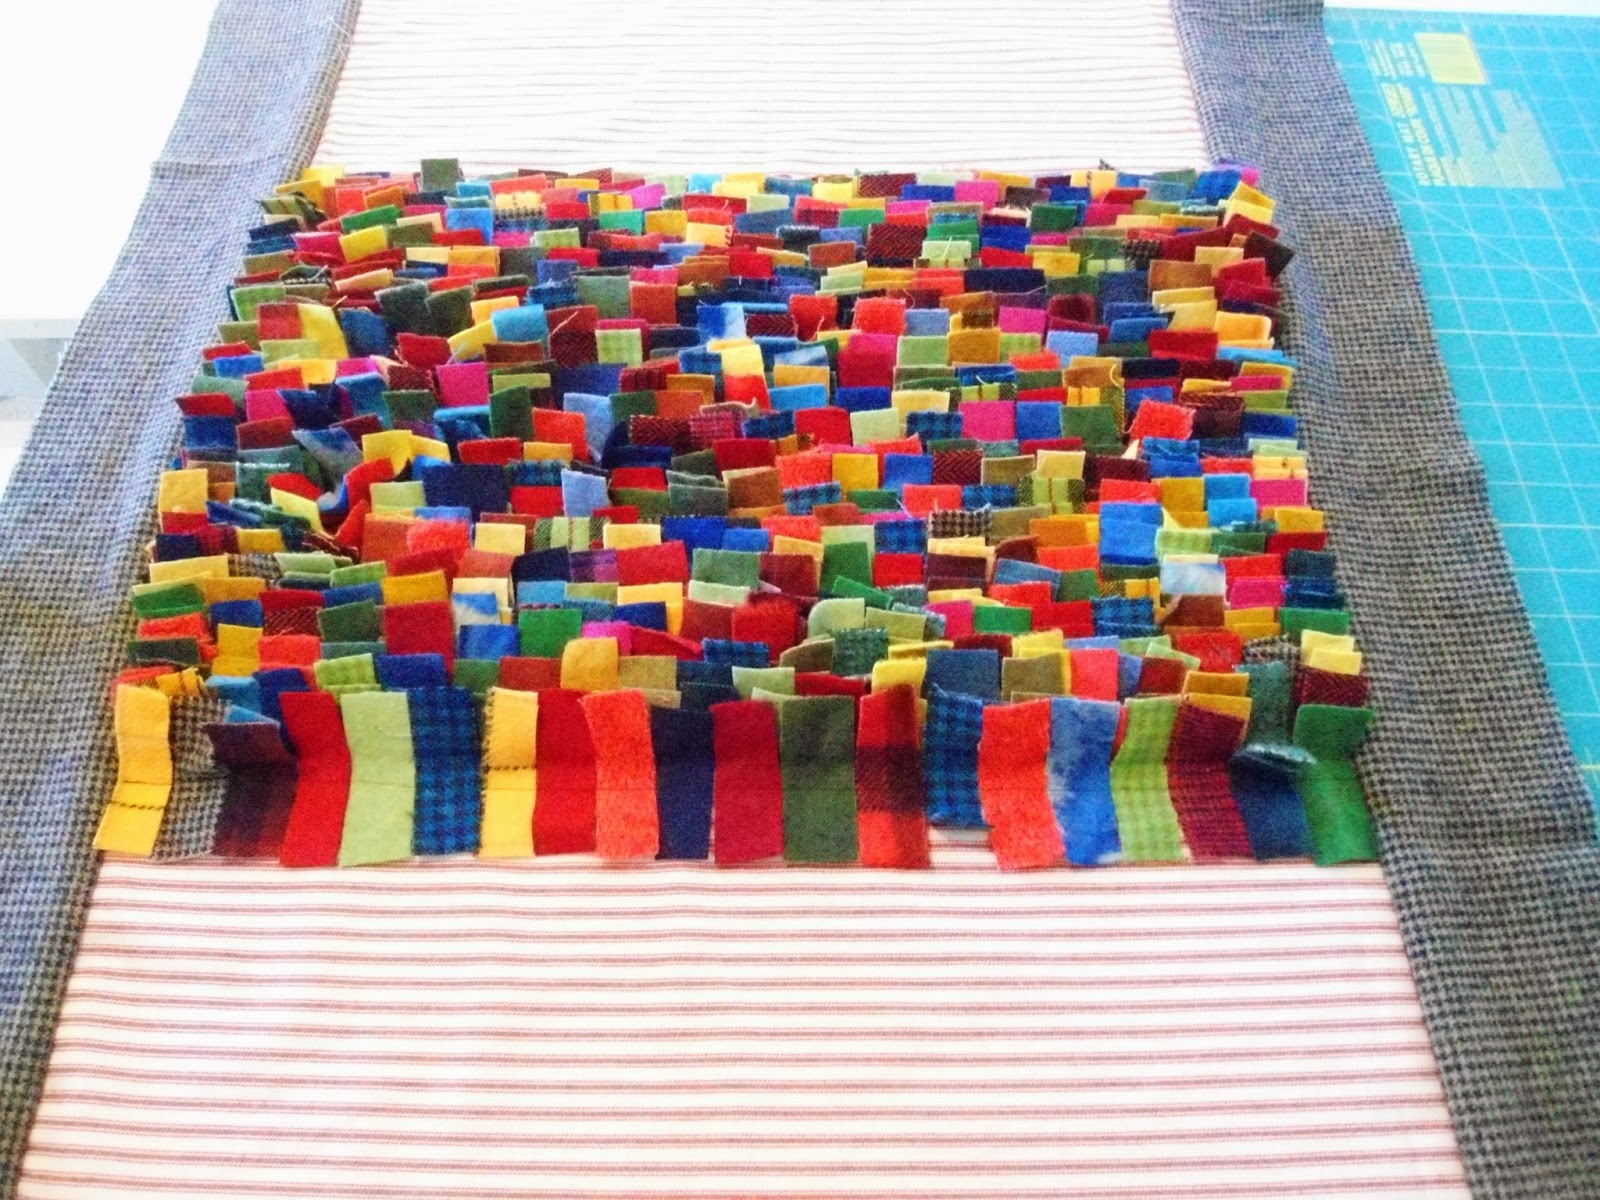
Here is mine so far, you can now see the facing strips on the sides. This is a perfect project for a retreat as you don't have to think too much at all.
There is a lot of hand dyed wool in here which adds some nice color, I didn't want a drab dark colored rug.
It is a small throw size, about 26 x 36 ,each stripe took about 20 strips, all types of wool were used. This is very free form so don't stress about the sizes of the strips. The more varied the better it will look.
Kelly