
 |
| Peppermint Patty |
Ok I promise this is the last time I will show this quilt! It is complete. The above picture is before it went into the washer and dryer. I used a red with white polka dots for the binding from my stash.
Also as a word of caution.......I washed every single piece of red fabric before I used it. Both of my Color Catchers came out very dark pink!

Two women in our guild, Carolyn and Jamie have started their own machine quilting business. So I took it to them and Jamie did a wonderful job machine quilting it. I chose an all over swirl pattern that gave me just the right density of quilting that I like.
If you are local and would like their information, send me an email.

To keep it real, I thought I would show you some of my blocks did not match up. It's totally my inexact sewing and not the pattern.

There are lots of ways to connect the ends of your binding . I bought this tool years ago and I really like it. I know you can figure it out with a ruler .......but for me this works well. Some women in my guild want to know about this so here is a tutorial.

The first thing to do is to leave a long tail on each end of your binding. See above, more is always better. There is nothing worse than to come up short and have to add to the binding.

I am right handed so my instructions will be the way I do it. Take the tail to the left and cut the end clean with a nice parallel cut.

Place the binding tool on top of the tail you just trimmed, with the arrow at the top and the edge of the tool along your newly trimmed edge.

My binding is 2 1/2 inches wide, these instruction will be for that size. There are 3 other sizes on the tool as well.
Take the tail on your right (the untrimmed one) and fold it so that the folded edge lines up with the 2 1/2" line. See above how the 2 1/2" mark just peeks out.

Trim your right hand tail off at the 2 1/2" mark.

They should look something like this.

Open out the right tail and draw a diagonal line like this. Measure down 2 1/2" on the right hand side so you know where to draw the line. You can see my dot.

This part is a bit hard to describe....after you draw your line on the right tail, twist it by 1 turn, it will look like it is not right. You may have to do this a few times to get it right. Next line up the ends of your tails and pin right on the line. DO NOT SEW YET.
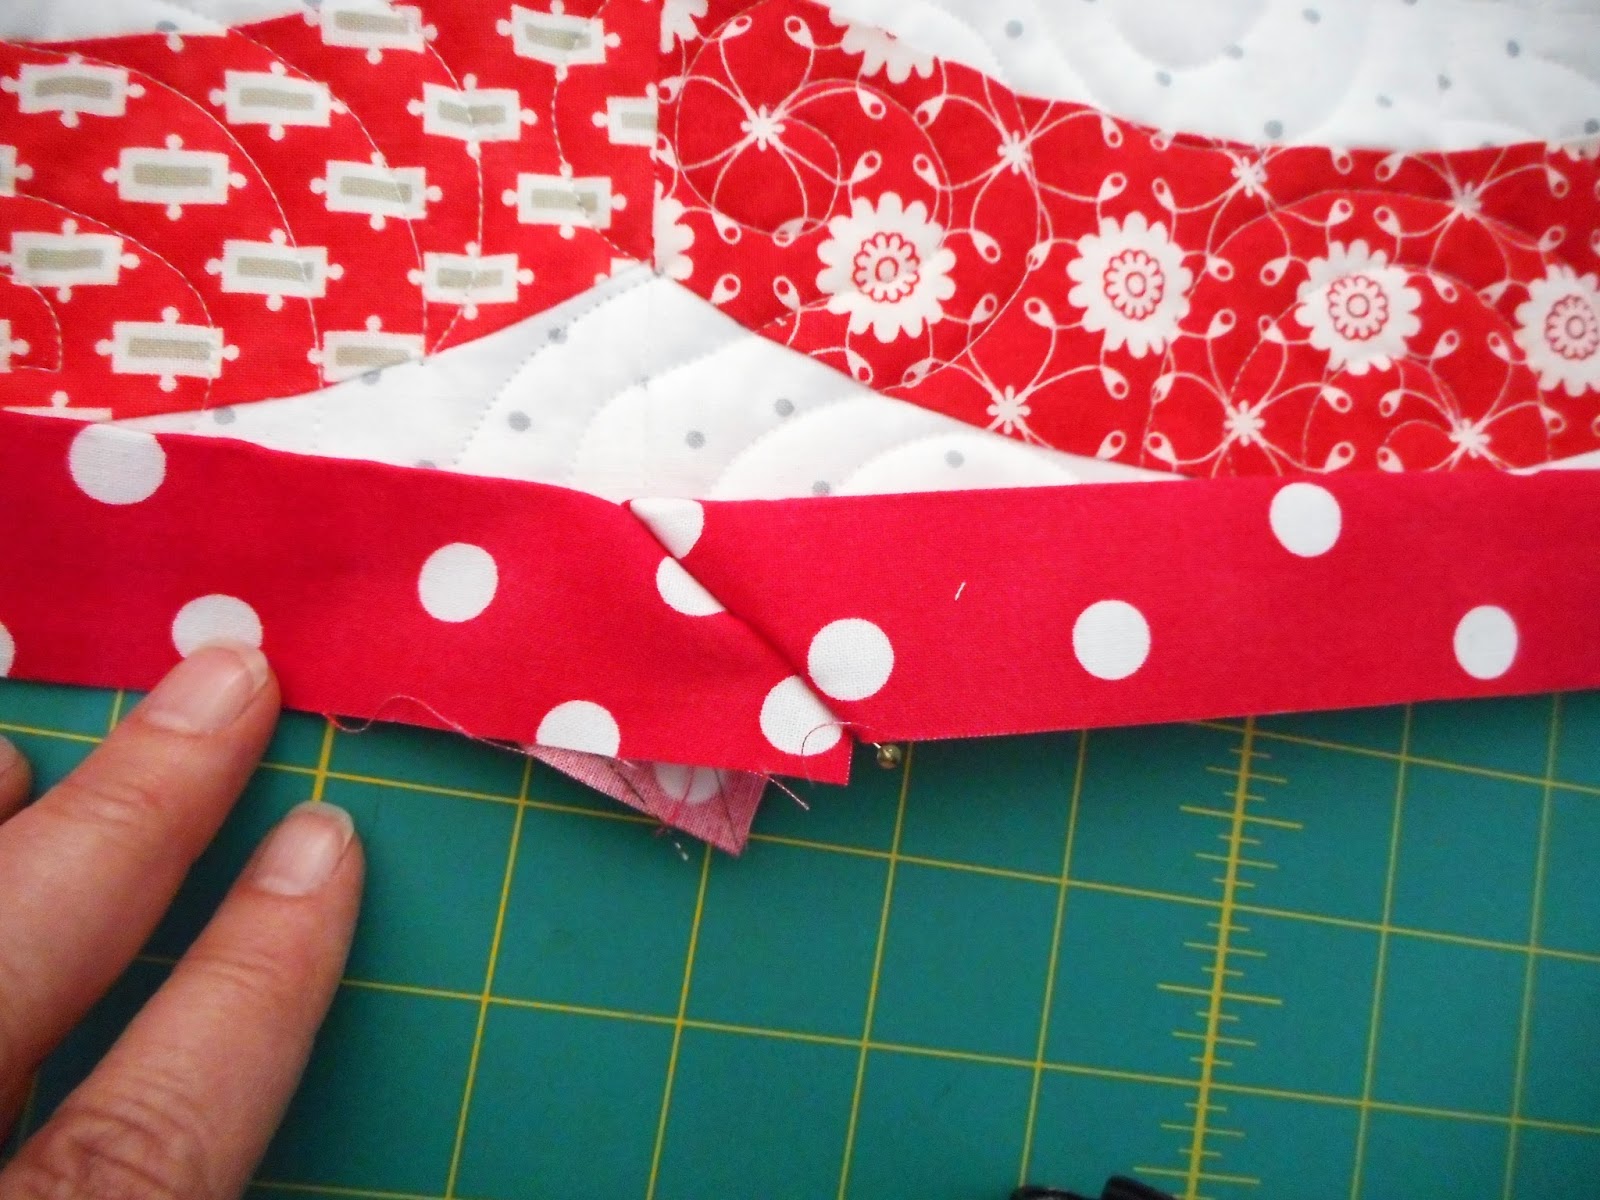
Turn it out to make sure it fits and it is not tangled up. This is easier to do than to explain. After you do it a few times it will come easy and you won't even have to think about it.

Sew on the line.....
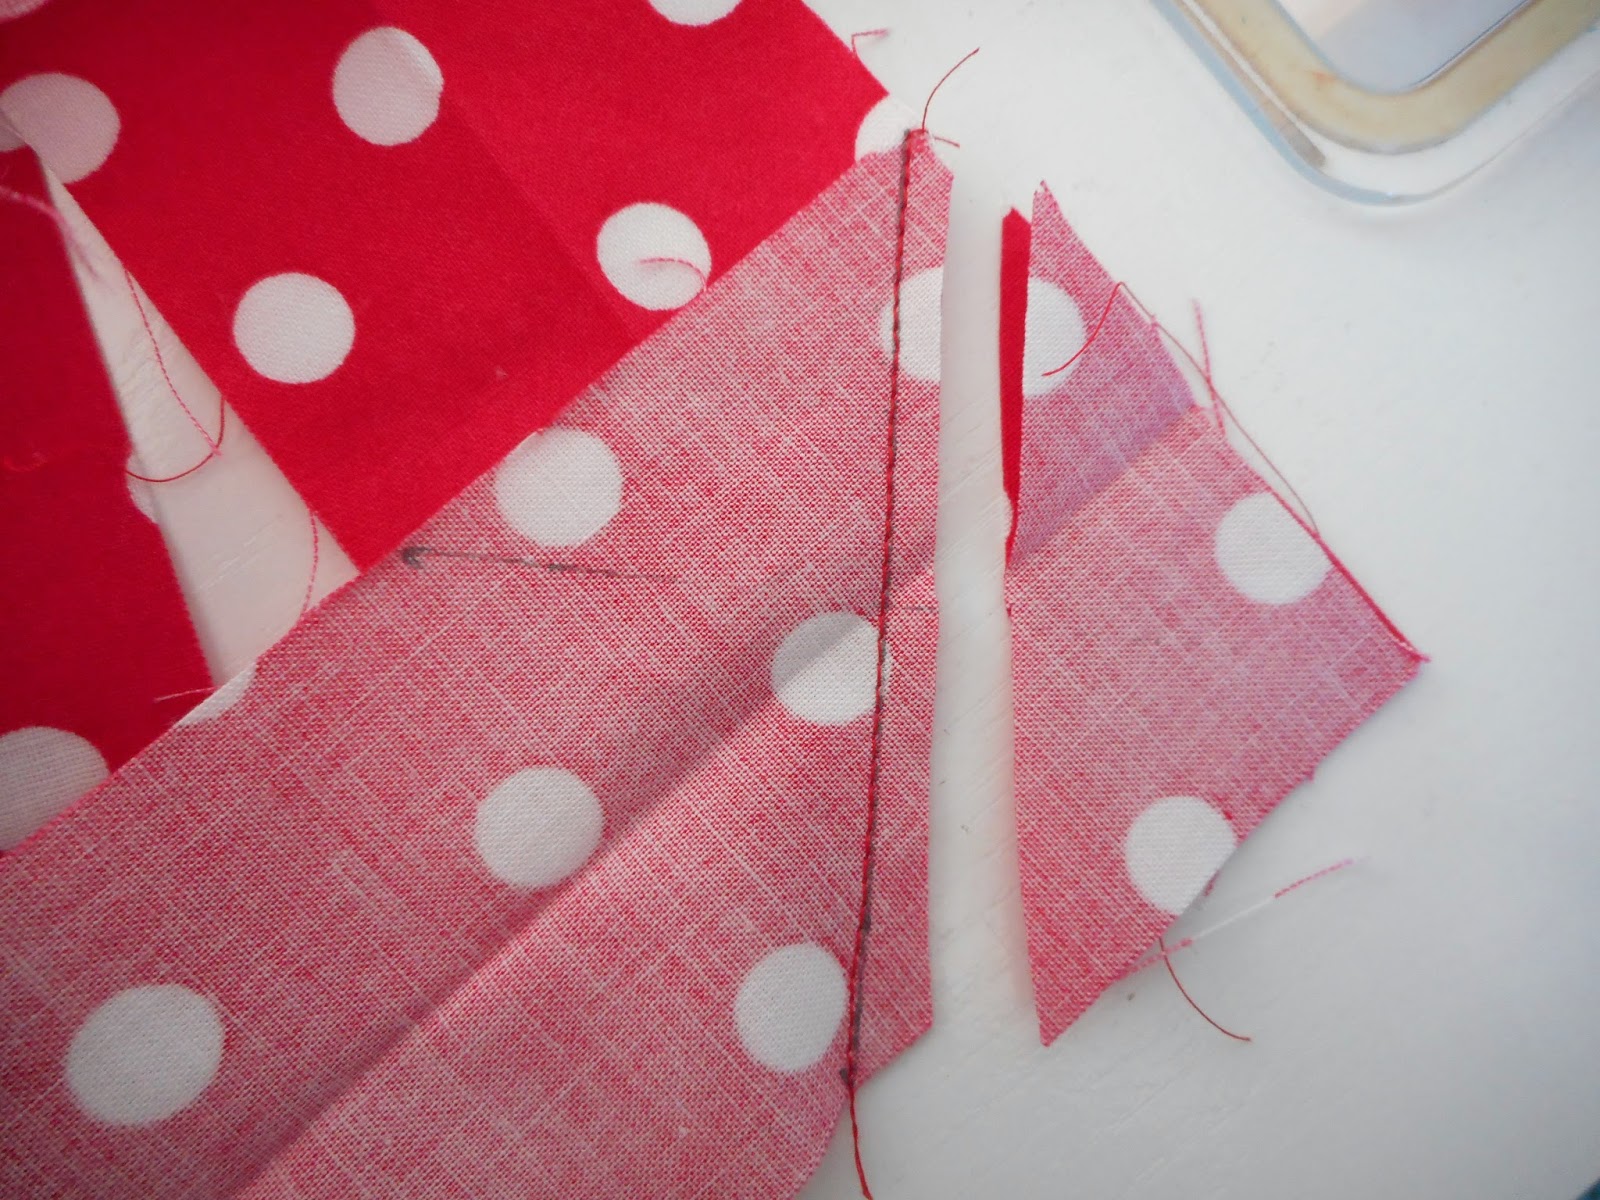
Trim the seam and press it open.

Start sewing where you left off and you are finished with a nice neat seam that isn't bulky.

The other thing I like to do after I sew on the binding is to press it from the front. I think it helps to turn the binding and gives it a nice crisp edge.

I also press right in to those miters which sets them nicely.
I have no idea if this is the way people usually do a binding but this is how I have done mine for years and it works pretty well.
Peppermint Patty Stats:
Size about 60 x 66
Fabric from my stash
Pattern is by Sew Kind of Wonderful using their Quick Curve Ruler.
Quilting by Jamie L- email me for her information if you would like it
The best part is that it is done for Christmas!
Kelly

