

Pillowcases are a fun, easy summer project.

Make 1 or 100!

You can make them with a friend,

a beginner sewer,

even a child!

I made some for all of my grandchildren, except Brynn who is not allowed to have a pillow-yet.

I am also making some for our guild charity project. This tutorial is for anyone wanting a quick, fun project.
I am just going to throw this out there.......if you want to make one for a child in the hospital I would be happy to have you send me one. We are collecting them at the September meeting and looking to have a bunch! Just email me at kellymx@aol.com for details.
This is a super duper easy one!
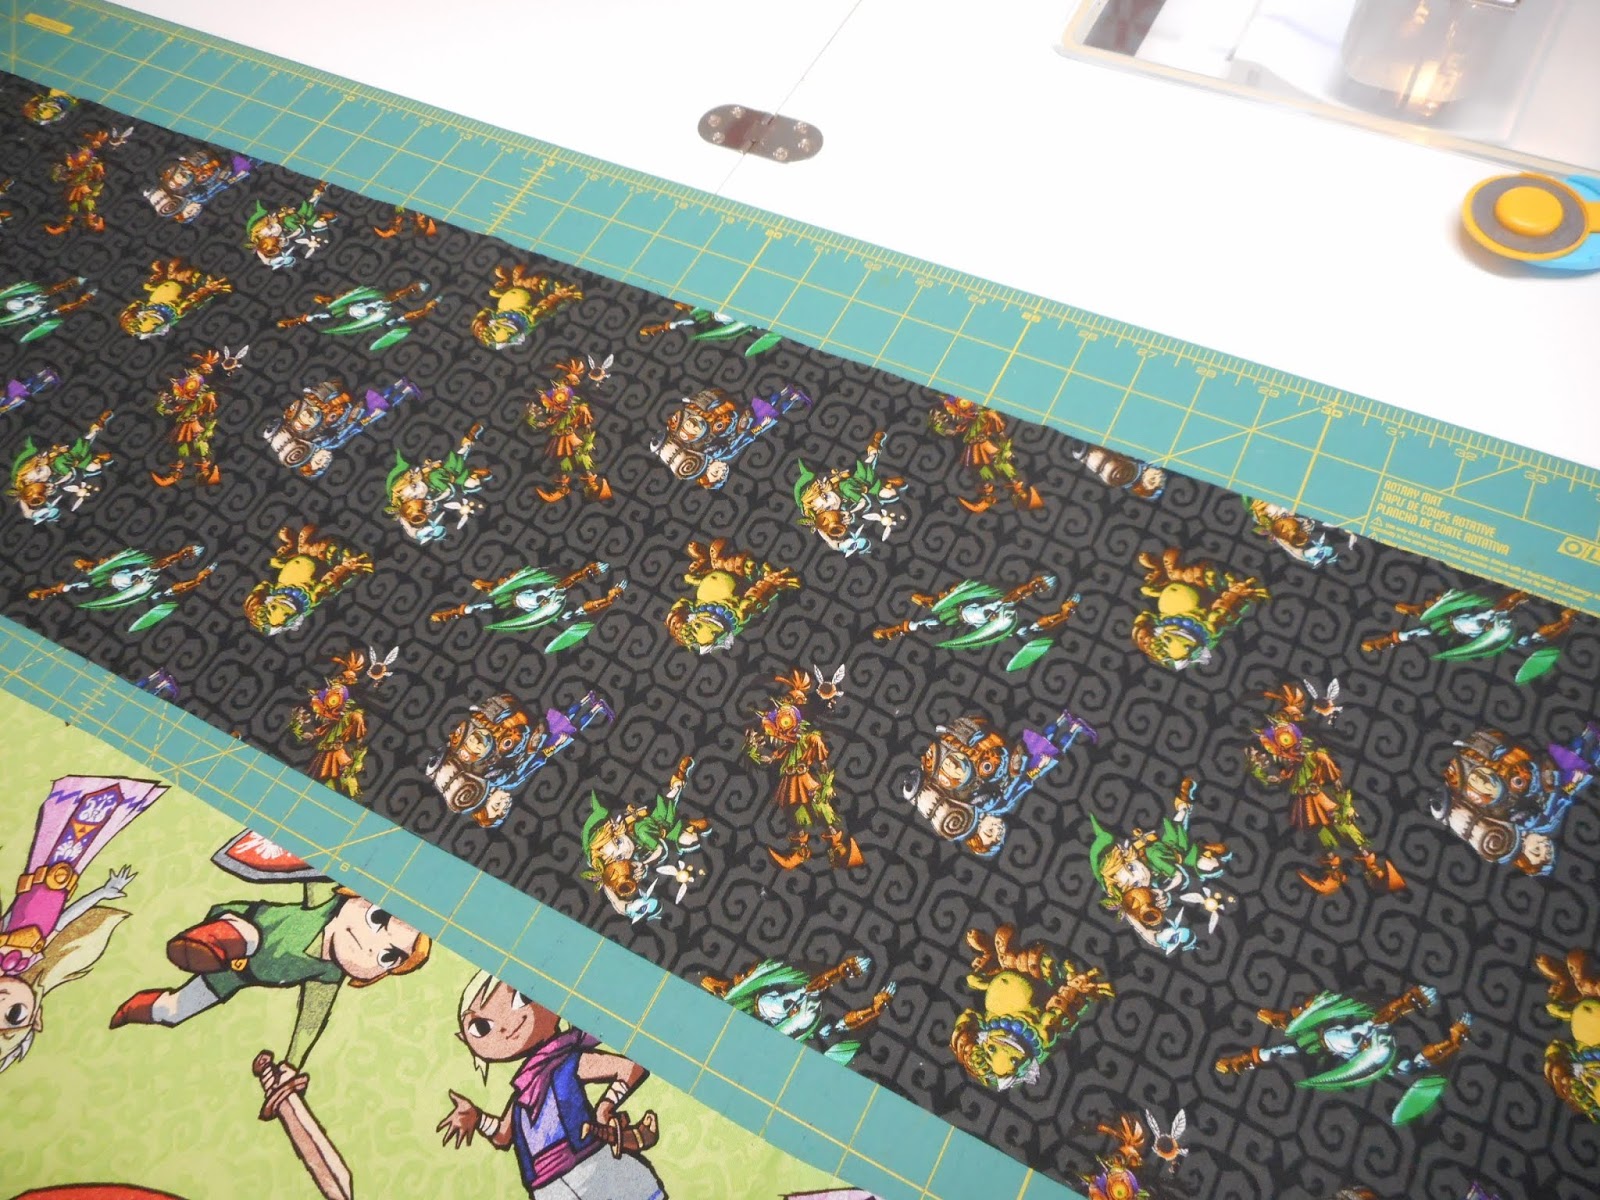
Main body fabric 3/4 of a yard. I did use flannel for 2 of them, but it just made it by the skin of it's teeth. You must wash it first because it shrinks a lot! I am suggesting good quality quilting cotton in a fun print.
Cuff fabric 1/3 of a yard in a co-ordinating print, this is a good way to use up some of your smaller yardage.

From the cuff fabric trim 10" wide, the selvadge is at the top, fold at the bottom.

Trim the edges to measure 41"

For the main body of the pillow case trim to ends to measure 41" again the selvadge is at the top

Trim the sides so it measures 27" wide
Lay the cuff right side up on your table

Lay the body of the fabric on top of the cuff also right side up matching edges

Roll the body of the pillowcase up as shown above

As you can see there is the cuff fabric on the bottom, the body fabric in the middle and I am enclosing it all with the bottom of the cuff fabric, pin well

Sew this altogether using a 1/4" making sure not to get the body of the pillow case in the seam allowance. Now you see why they call it the hot dog or taco method.

Pull the body out of the end of the cuff

It will look like this. The edges of the cuff are completely encase to prevent fraying.

Lay the pillowcase on your table WRONG sides together. YES Wrong sides together. Say it again, wrong sides together......

Sew with a scant 1/4", I do it more than a scant to make sure those edges will be hidden.

Once you have sewn it all around, (wrong sides together) turn it so the RIGHT sides are now together, press and sew all around with a 3/8"seam allowance. This is called a French seam and it keeps all those raw edges hidden and looks nice and neat.

This is called The Purple Thang and it is a great tool to poke out those corners. Be sure to do it gently so you don't poke a hole in your pillowcase.

Press it and you are done! I have timed myself and was able to sew one in 15 minutes. These directions are all over the internet and I do not know who started them or I would give them credit. I think they would be happy to know these are going to charity!
Let me know if you have any questions or if you are interested in sending me some pillowcases!
Kelly
Thanks Kelly for the pillowcase tutorial. Just this past weekend, I was looking at cute fabric and thinking on making one or more. Yes, it would be a perfect learn-to-sew project for a kid especially during the summer months.
ReplyDeleteThank you!
DeleteSuper Cute cases!!!
ReplyDeletegreat tutorial I'll be bookmarking it.
It is super easy!
DeleteDo you receive this, my reply?
Great instructions! And I love the idea of making them with the grandkids. My grandson is always trying to figure out what to sew!
ReplyDeleteThanks for the idea!!
It really is a nice easy pattern!
DeleteHello, I went by to say hello, since I've been disconnected from everything for a long time. As always I love your work. That I still think that they are not chapucillas, but great works. A kiss.
ReplyDeleteดูหนัง
ارقام شركات مكافحة الحشرات بالاحساء
ReplyDeleteشركة تنظيف مجالس بالاحساء
شركة تسليك مجارى بالاحساء
شركة المثالية للتنظيف الجبيل
شركة المثالية للتنظيف بجدة
شركة المثالية للتنظيف بالدمام
ReplyDeleteالسلامه عليكم ورحمة الله وبركاته نحن فى شركة الكمال نقوم بافضل واقوى المبيدات العالميه الموجودة
التى تقضى على جميع الحشرات الطائره والزاحفة وابادة الحشرات
شركة
مكافحة حشرات بالطائف
شركة مكافحة حشرات بجازان
شركة مكافحة حشراتةبحائل
شركة مكافحة حشرات بحائل
والسلامة عليكم وحمة الله وبركاته
Thanks for providing such a great Information, you can see
ReplyDeleteتقوم شركتنا المؤسسة الأولي في ميدان نقل الأثاث والاثاث ببابها في إدخار افضل خدمة تغليف نقوم بها في عملية تغليف الأثاث والأثاث بأسلوب وعناية فائقة الدقة والأمان، فكل قطع من قطع العفش تتطلب إلى التغليف بأسلوب خاصة فالأثاث له كيفية للتغليف والزجاج أيضاًً له أسلوب للتغليف وايضا محتويات النيش والأدوات الكهربائية والأجهزة كل تلك القطع لا تتشابه أسلوب تغليفها عن القطعة الأخرى ولكل قطعة منهم طريقتها المخصصة في التغليف التي تقوم علي حمايتها من أي ضرر أو تلفيات أو خدوش أو كسور.
ReplyDeleteشركة نقل عفش
شركة نقل عفش من الرياض الى الاردن
شركة نقل اثاث من الرياض الى الاردن
شركة نقل عفش بمكة
ReplyDeleteThanks for sharing a useful knowledge-sharing blog.
It helps in understanding and increase in knowledge.
Best Regards,
Prestashop addons
Prestashop modules
Presta addons
Magento extensions
Prestashop Structured Data Schema Markup & Rich Snippet
Prestashop Custom HTML CSS JS on Selected Pages
Prestashop Hreflang Tags for Multilingual Store
Prestashop Products Extra Tabs
Prestashop Social Login – Sign-In using Social Networks
Prestashop Custom Banners for Selected Categories and Languages
Prestashop Social Media Side Bar Links Buttons on All Pages
Prestashop Open Graph & Twitter Card Tags Generator
Magento Geolocation Redirect Visitor Country
mmorpg oyunlar
ReplyDeleteinstagram takipçi satın al
tiktok jeton hilesi
tiktok jeton hilesi
antalya saç ekimi
Instagram takipci
İnstagram Takipçi Satın Al
Metin2 pvp serverlar
instagram takipçi satın al
smm panel
ReplyDeleteSmm Panel
İs İlanlari Blog
instagram takipçi satın al
hirdavatciburada.com
beyazesyateknikservisi.com.tr
servis
tiktok jeton hilesi
Good content. You write beautiful things.
ReplyDeletehacklink
sportsbet
sportsbet
mrbahis
mrbahis
taksi
hacklink
vbet
korsan taksi
Success Write content success. Thanks.
ReplyDeletebetturkey
canlı poker siteleri
kıbrıs bahis siteleri
kralbet
betmatik
canlı slot siteleri
betpark
kadıköy
ReplyDeleteserdivan
çatalca
tunceli
fethiye
L85V6
ağrı
ReplyDeletemuş
mersin
afyon
uşak
CUD
https://saglamproxy.com
ReplyDeletemetin2 proxy
proxy satın al
knight online proxy
mobil proxy satın al
51P
That is actually a terrific web site. Feel free to visit my website;
ReplyDelete
ReplyDeleteHello there, You have performed an excellent job.
I’m confident they will be benefited from this web site.
ReplyDeleteHard to ignore such an amazing article like this.
ReplyDelete
ReplyDeleteThanks for sharing this marvelous post. I m very pleased to read this article.
Thankѕ for sharing your thoughts. I truly appreciate you efforts
ReplyDelete
ReplyDeleteThanks for your excellent blog and giving great kind of information.
Great Post for Beginner to understand. I finally found great post here. Thanks for information. Keep sharing more articles.
ReplyDeleteYoure so right. Im there with you. Your weblog is definitely worth a read if anyone comes throughout it
ReplyDelete
ReplyDeleteHi, all is going well here and of course every one is sharing facts, that's really fine, keep up writing
Thanks for the great article.
ReplyDeleteشركةكشف تسربات المياه ب الدمام