Wednesday, May 27, 2020

Going in Circles


Yes I have started another quilt! This is Chic Country by Sew Kind of Wonderful. They make the Quick Curve Ruler. Scrappy seems to be my thing these days!


It has gone pretty fast once you get all the  pieces cut out. That takes forever!!!! It does become mindless sewing which is good for me right now.


For those of you that have never used the Quick Curve Ruler, it will change your mind forever on curves! It makes them easy and doable.
After I cut out all those pesky pieces and sew them together it will look like this. Pretty bad? At this point you can spray it with starch or my favorite, Mary Ellen's Best Press.


Next comes the trimming, it's very satisfying.....


Pretty darn easy and a pretty perfect block.


AND you can chain piece them for an even faster way to go.


How perfect (for me) is this fabric? It is decorator weight and I am planning to make an ironing board cover along with a new board,  I need a bigger one. It is by Lori Holt and she has a Youtube video on how to make the ironing board. My friend Stephanie and I think she is the most clever quilter out there. She knows what we need before we do! 


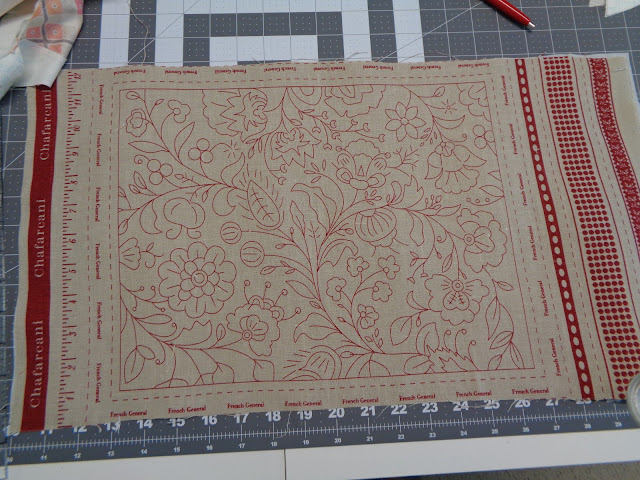
I ran across this on Instagram and fell in love with the pattern and the colors. It's by French General.


It is not something I needed to add to my "pile" but I feel like things are slower in the summer and it may be just the perfect porch activity.

Once again, to those that emailed me for a pattern. If you did not receive one, it is because it did not include your email address and I have no way of know where to send it to. Same thing with comments. I always respond to every single comment, unless I don't have your email address.
Another thing.....Blogger has changed and I am not sure if I have figured out all the new steps. I hope this turns into a blog post!

Kelly

Monday, May 18, 2020

What Are You Sewing?


So this is on my design wall today. These are blocks for a Sew Along that my guild is doing. I am the organizer so I need to see this often to decide what the next blocks will be. This could not come at a better time for our members. I even added blocks because we all have a lot of time on our hands!


I love this book block! It was a fun one. I had to figure out how to fit in those titles.


All of my guilds have started having Zoom meetings. They are fun but let's face it, not quite the same as the real thing. I am hoping things will get back to normal so we can see real quilts and hear real lectures.
I won these at the Lancaster Modern Quilt Guild last week. I have always loved the Quick Curved Ruler. The book has a fun tulip pattern I want to try.


So of course I had to try it out. Two blocks made using (2)  5" squares. They came out perfect which is the whole idea behind the ruler. If you have been wanting to try curves, this is the perfect tool. I do have a quilt in mind......


This is a Fig Tree block of the month. I am enjoying it and am excited to see how it unfolds.


My focus is still a bit shaky.....this is how the block is supposed to look


but I got this one instead! Oh well it will truly be my quilt.


I have also started a doll quilt. These blocks are 3 1/2". I will set them with alternating blue squares. At least that is the plan for now. As you can see, one can never have too many projects!


Wow! A lot of you wanted to make this quilt! I sent out about 200 patterns!!! I can't wait to see what you all do with it. I love how mine turned out and the colors are so bright outside. It feels kitschy and a little 1970's to me. Please ignore the dirty deck, we haven't cleaned it yet.


I feel like this is a pattern that you can use any fabrics with and have a successful quilt.


The more fabrics the merrier and the crazier the better!


So to be clear the size of the block is 10" not 12", I wrote it wrong. Also if you emailed me and did not get the pattern it is because I did not get your email. Sometime when people email the email address is not there. If this is you, please send me another email and include your email address in it and I will be happy to send it to you.
Now how to quilt it.....and figure out the name.

Kelly

Wednesday, May 6, 2020

Pandemic Quilt Paper Piece Tutorial


Wow! What a great response to my post yesterday! It sounds like a lot of you are looking for a fun and easy project. The first thing I need to do is correct the block size. I thought it was a 6" finished block. It is a 5" finished block. So the 4 blocks will make a 10" finished block.
This is a good project for those of you who have never tried paper piecing. I think it just might be the easiest block ever! PLEASE READ ALL THE DIRECTIONS FIRST!
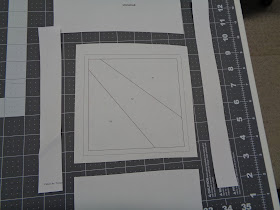
The first thing is to print out the blocks and trim away the excess paper. It will just be in your way. Sorry the pictures are not too good, it is a rainy day here today.
Go to the prior post to read more about this quilt.


****Edit to original post**** You can only get the pattern by emailing me at kellymx@aol.com  If you have left a comment and did not receive the pattern it is because it did not include your email. Email me directly to get it.


For each block you will need 4 pattern pieces.


Find yourself a book mark or another stiff piece of thin cardboard.


Use it to fold over the edges of the lines in the center of the pattern.


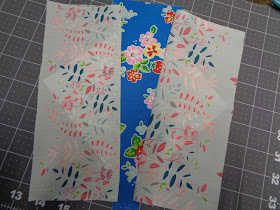
This will help you line up the fabric. It should look like this.


Cut out the outside fabrics 4" x 9" You could fussy cut or do anything you want. Once you make a few you will see what I mean.


Cut the center fabric 3 1/2" x 9". Be sure your fabrics are flat. Iron them if needed you will get better results. I never sew with wrinkled fabric, I am more likely to make a mistake.


Lay your center fabric right side down on your cutting mat.


Place you pattern with the lines showing on top making sure it is in the center of the strip.


Go ahead and pin so it does not move around. make sure the pins are out of the way of your sewing machine foot. Notice how the blue pin is off to the left.


Next you will fold the paper back for the first side as shown above.


Take you rotary cutter and trim off the excess fabric about a 1/4" away from the edge. You do not need a ruler to do this, just eyeball it. If it is a little bigger that is okay.


Place your side fabric right side up. Notice I said right side up!


Place the pinned paper pattern on top. Think of this just like you would sew as normal, right sides are together with a paper on top. Keep the edges even, there is no need to pin.


Shorten you stitch length. On my Bernina it is 1.50.


Make sure the edges are even. Start sewing from the edge of the paper, right on the line. See above.


Finish sewing the same way, past both lines.


It should look like this.


Turn it over and make sure all the paper it covered and the right sides of both fabrics are showing. Press well.


Flip it over to do the other side. We will do it exactly the same way we did the first side.


Fold back the paper and trim the excess fabric.


The side fabric on the bottom is right sides up and place the edges together.


I will look like this. Remember your fabrics are right sides together with the paper on top. Sew as above.


Once all the fabrics are sewn it will look like this on the back......all the paper is covered.....


and like this on the front. Press it well.


To trim up the block you place your ruler's 1/4" mark on the solid line and cut on the dotted line.. It is more important that your ruler is on the solid line than to have the edge line up with the dotted line.


Trim it up, and do the other three sides.


It should look like this. If you cut off those solid lines you will have a block that is too small.


Carefully tear off the paper. I put my finger on the seam and gently pull. They come off pretty easy.


Do one side, then the other side. The center comes off last.


Your block should look like this! Now wasn't that easy?


To make one block you will need 4 sections. Or maybe you want to come up with your own idea? These are not sewn yet because I am not sure if they will be a block.


This is a messy process. Make the mess to get the quilt you want. I am so happy with where this is going and am anxious to finish it up.
Please be sure to send me pictures if you make a quilt using this pattern!

Kelly